[TUTORIAL] How to Import a Digital Scrapbook Kit into Storybook Creator v4.0
When I released my Stories 365: Jumpstart Templates last week, I received an e-mail asking if my templates were compatible with Storybook Creator. They aren’t – YET. I was briefly familiar with Storybook Creator in the sense that I knew it uses .page as it’s file extension. But that was about it. So I spent the day investigating the software…�
I REALLY like this software – ESPECIALLY for a beginner scrapper. It’s so fluid in how you add papers and elements to your digital scrapbook pages. While I don’t see an experienced Photoshop or PSE digital scrapper ever using this software, it is PERFECT for the beginner.
If you are just starting to learn how to digital scrapbook and/or want to simply create digital scrapbook pages without the steep learning curve most digital graphics software have, Storybook Creator is definitely for you. I was very impressed. So much so that I wanted to share some quick getting started tutorials with you.
�What I thought was really cool about the software is that you can import your digital kits (any kits with JPG or PNG files) and then pick that kit from a drop-down menu on your layout page. SBC then visually shows you all the papers and embellishments from your kit. You simply drag-and-drop them into place on your layout. Uber cool.

Getting Started with Storybook Creator v4.0
First, if you don’t have a copy yet, you can download a FREE 30 day trial of the software�HERE. If you want to read more about the Storybook Creator software go�HERE.
When you first start up the software, you are given the option to use the BASIC or ADVANCED mode. I just choose BASIC. I didn’t see much differences between the two other than the ADVANCED option puts a few additional tools on the menu bar like ALIGNMENT but you can reach those in the BASIC menu too.�
Okay…so you are using Storybook Creator and you just bought a digital kit, now what?�
Importing a Digital Scrapbook Kit into Storybook Creator v4.0
1. On the opening screen, you’ll see an option up on the top bar to IMPORT CONTENT. Select that.
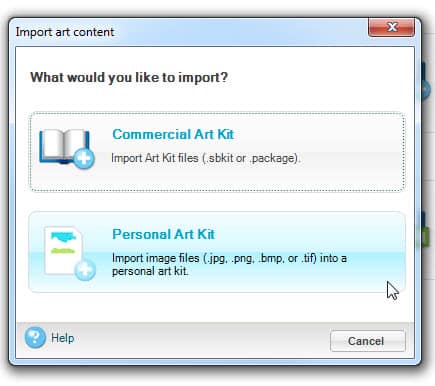
2. On the following screen, select PERSONAL ART KIT since you are importing a non-SBC kit.

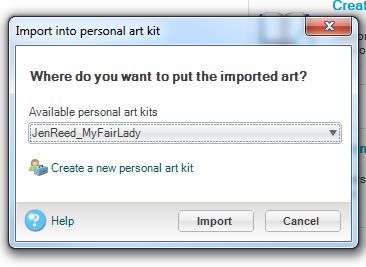
3. You’ll then select the TEXT option “Create a new personal art kit“. �Name the folder for your kit and select PERSONAL ART KITS for its location. I’m going to import my My Fair Lady collection. You do not need to use underscores like I did.�

4. On the next screen, click IMPORT.

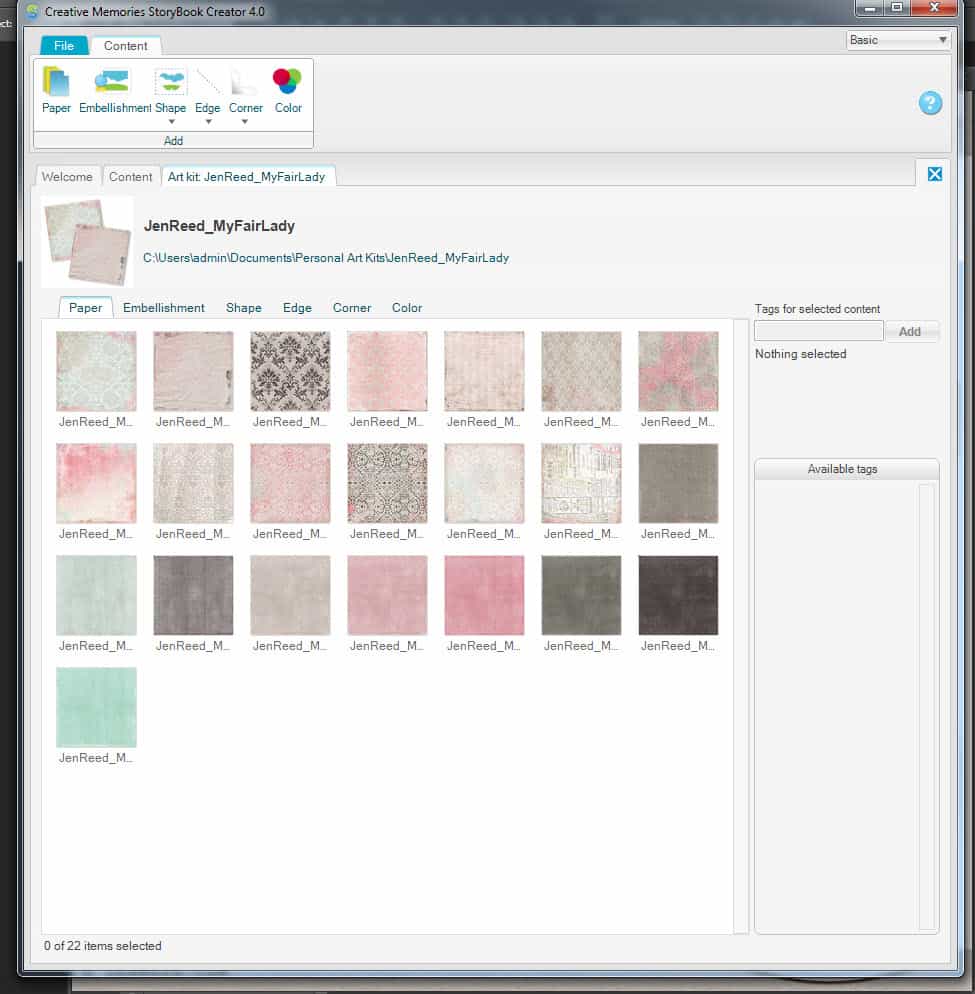
5. You’ll be taken into the content side of the folder where you can import the kit’s papers and embellishments. Click on PAPER and browse to the location where you unzipped your kit’s paper files. You can import ALL your papers at one time by selecting the first one and holding down SHIFT and selecting the last one.�

6. This is what it looks like after I import all my papers.�

7. Now click on the EMBELLISHMENT option and import your kit’s embellishments. You can then do the same for the wordart and any alphas that came with the kit. Unfortunately SBC doesn’t have separate options to import those under a different tab. It would be nice to keep them separate from the other embellishments.
8. Once you have everything imported, you are ready to take your kit for a spin! Click back on the WELCOME tab and select CREATE A NEW PROJECT OR PAGE. �I just picked PAGE since I’m not making an entire album.�
9. I’m not sure of the inner workings of SBC with all the print options they show. For my purposes, I just want to save my layouts as JPGs to have them printed elsewhere so I created a 12×12 custom option for my pages.

10. Once I select my custom 12×12 layout option, SBC opens up a blank canvas. On the right side, you’ll see a CONTENT window where you can select which kit you want to use. If you don’t see the kit you just imported on the right side, click on the dropdown bar.
click image for larger view�
11. Select the kit you want to use from the list.
12. Now you should see the papers (and embellishments when you click that tab) on your layout page.�
click image for larger view�
13. Click and drag the papers and embellishments on to your canvas to start scrapping your layout! �Pretty cool, eh?
click image for larger view


