Learning to take photos with a DSLR camera
Santa came a bit early for me this year… and shipped me a brand spankin’ new Canon 60D DSLR camera! I’ve been thinking about getting a DSLR camera for a few years now. Every time I thought “okay I’m going to do it” I just couldn’t get past the price tag. Do I really need that expensive of a camera when I can’t shoot all that well with my current point and click? My answer was always “No, can’t do it”. I don’t know how many times over the years I “attempted” to shoot manual with my regular Canon. I have a Canon Powershot S3. Oh did those sessions turn out horrible! … too dark, too light, too blurry… too frustrating. And I’d give up and go back to auto.
Recently I started thinking about getting a DSLR camera again. I see some absolutely wonderful shots that friends post on Facebook.
I can do that. I know I can. But will I have enough patience?
There was a big part of me that was (and is) nervous that this $1000 camera is just going to sit there. I’ll become frustrated with it and will give up. But I stopped listening to that voice and went ahead and ordered the camera. I wanted it early enough that I could play with it before Christmas.
The camera came this week and yesterday was Day 3 of me shooting with it. The first night I shot with it, I was absolutely LOVING it. I took a ton of photos of the kids, the tree and even the dog.�I looked at the photos in the LCD panel and thought “WOW! WOW! Those look awesome!”. I even showed Rick how great they were looking. I had never got photos like that before.
The next morning came and I was so excited as I moved those photos from my card to my computer and then�the “shooting in manual” reality struck.
The LCD display LIES! LIES LIES LIES!
The photos that I thought were great (and some shots were truly great) were all blurry. All of them! Blurry! I wanted to CRY! I was so disappointed.
The photo below is one of those photos that I couldn’t wait to see up close only to find that it was not sharp at all. The shutter speed is too slow and while it did capture Rogue’s tongue it also made Dan out of focus. My hands can’t stay still at this speed (1/10). It’s too slow – the shutter stays open too long and my hand shakes before it closes causing the blur. This is a different blur than the tree being out of focus. The tree is supposed to be out of focus but Dan was supposed to be sharp.
This next one of Dan came out okay. �He isn’t as blurry and once I corrected the white balance it made it better too.

I took this next photo on Day 2 when I was working on keeping my ISO down at 100-200. The photo sharpness is definitely better than 95% of what I had shot on Day 1.

On Day 3 I got some nice photos of the first snow fall of the year. �I put the focus on the tree with the background slightly blurry.
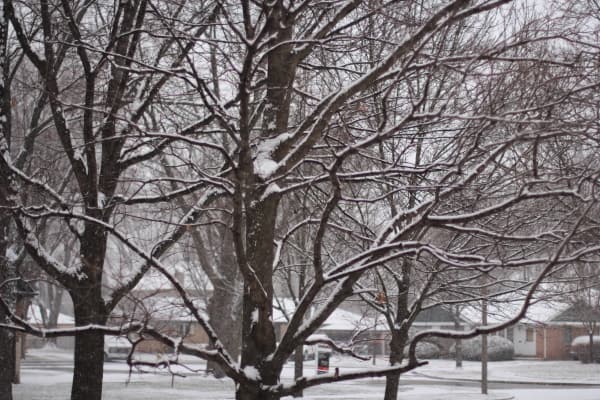
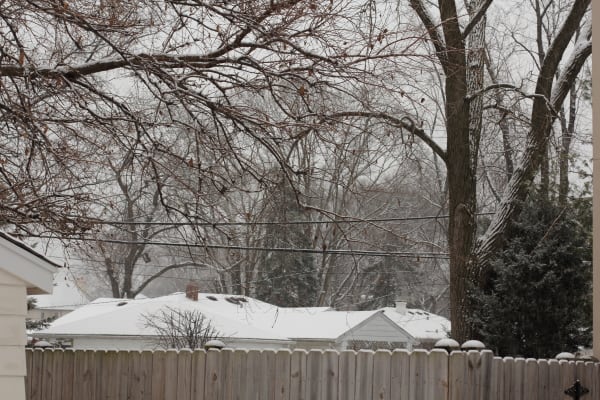
These last two are also Day 3 photos. If you go back and look at the first photo and then this one of Sam below you can see the focus is more sharper here and ironically the lighting was actually worse for the photo below.


Obviously I’m not an expert at taking photos with a DSLR as I’ve only had the camera for 4 days. I know I have so much more to learn.
But… there were a few things that I learned right off after reading bits here and there that helped me not be so frustrated and take better photos out of the gate.
Most of my photos will be taken indoors of my kids. I’m sure I’ll get photos outside too but for the most part I’m looking to capture more indoor spontaneous moments. I think my photos on Day 1 would have been so much better if I knew where to at least start. I was just randomly trying things. I’ve gotten lots of advice here and there and tried to do some of the suggested things – �like let the camera manage a few settings while I control just one or two. I did take some photos like that but the camera would do things like make the ISO too high or the shutter speed so slow that the end results still were not working for me.
I personally think a lot of these photography blogs out there or even people you know that have a DSLR camera, forget what it was like the first few days they tried to shoot manual. By now they know so much more about photography and all of the vocabulary associated with it that they have a hard time breaking things back into laymen’s terms. They tell you what all these words mean but not where to really start. It makes your head spin.
For me the�epiphany�was once I realized I need to set my settings in a specific order each time and start checking the exposure meter to help me adjust those settings. Once I did those two things my photos immediately started getting better.
Here is what I came up with as a decent place to start when just learning how to use a DSLR. Again, this is just a START for the complete newbie who knows nothing about what any photography term means. You just want to take some good shots right away – not spectacular – but decent enough to justify the amount of money you just forked over for this amazing DSLR camera. 😉
- Set your settings in the same order each time. �I’m now setting in order of ISO,�aperture then shutter speed.
- Start with your ISO set to 100 or 200. The higher the ISO the grainier or noise your photo will be. In the very first few days of using your new DSLR camera don’t go higher than 200. Set it and leave it.
- Then set your aperture according to how much background blur you want. I found myself between 1.4 – 2.2. I also had a difficult time shooting at�aperture�4 or higher indoors because the light was too low light so I stayed pretty much at 1.4. �(Your 50mm lens may only go to 1.8.)
- Next look at the exposure meter bar. This is what was missing for me in the first two days. On Day 3 when I started using the exposure meter my photos were MUCH better. In laymen’s terms this bar shows you if the photo is going to be too dark or too light.�The exposure meter looks something like this…On my camera, I see this on the top and in the viewfinder.�
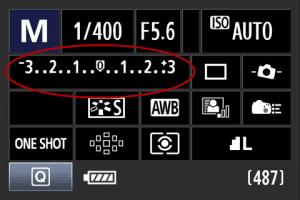
- While looking at the exposure meter, adjust your shutter speed until the exposure setting moves somewhere into the middle.
- Now here’s the catch… when starting out you are�probably�shooting with a 50mm lens. �Rule of thumb is the 50mm lens can’t handle slower speeds than 1/50 without a tripod or a very steady hand (which I certainly don’t have). Maybe you can go down to 1/30 or 1/40 and still be okay but for those first few days of using the camera try to stay at 1/50 or faster to avoid the hand shake blur. As the bottom number goes higher the shutter is faster – 1/100, 1/400 1/1000 is faster and okay but 1/15, 1/10, 1/8 are slower and need a steady hand or tripod.
That was my problem my first day when I thought I had gotten great photos but they came out with a slight motion blur. Looking back at the photos I took that day all of them are at speeds 1/10 or 1/15 which is too slow. My hand can’t stay steady that long. So don’t frustrate yourself… keep the speed at 1/50 or faster in the beginning.
QUICK CHECKLIST
So for a complete DSLR newbie shooting manual for the first time, here’s a good place to start with your settings.
- Set ISO: 100-200
- Set Aperture:�1.4-2.2 (maybe up to 4)
- Look at the exposure meter
- Set Shutter Speed: 1/50 or faster (higher bottom number is faster) till you get the exposure meter somewhere close to the middle.
Now if you find that when your shutter speed is 1/50 and the exposure meter is still off the scale and the only way to get it right is to make the shutter speed slower – DON’T! Instead go back and adjust the aperture. If you are already on the lowest setting that your lens can go (1.4 or 1.8), you could try raising the ISO but don’t go over 800. The better answer (for the newbie) is to keep your ISO low and find a way to add more light to the room instead.
My first DSLR photos are FAR from perfect and definitely FAR from where I want to go. BUT… they are as good as the photos I have taken with my point and click camera and a lot of them are better since I can change focus. When I first started with the DSLR (4 days ago lol!) I just wanted to at least be able to take photos as good as my other camera. I think I’ve accomplished that and am now looking forward to learning more about photography and shooting those “WOW!” shots!

